从零开始搭博客
此文章简单介绍了如何通过Hexo+GitHub+Next从零开始搭建一个完整的博客
不过因为之前博主没有了解到Markdown图片的引用方式,导致博客图片全部炸掉,博主会找个时间把它修改回来。
相关软件工具下载
Node.js
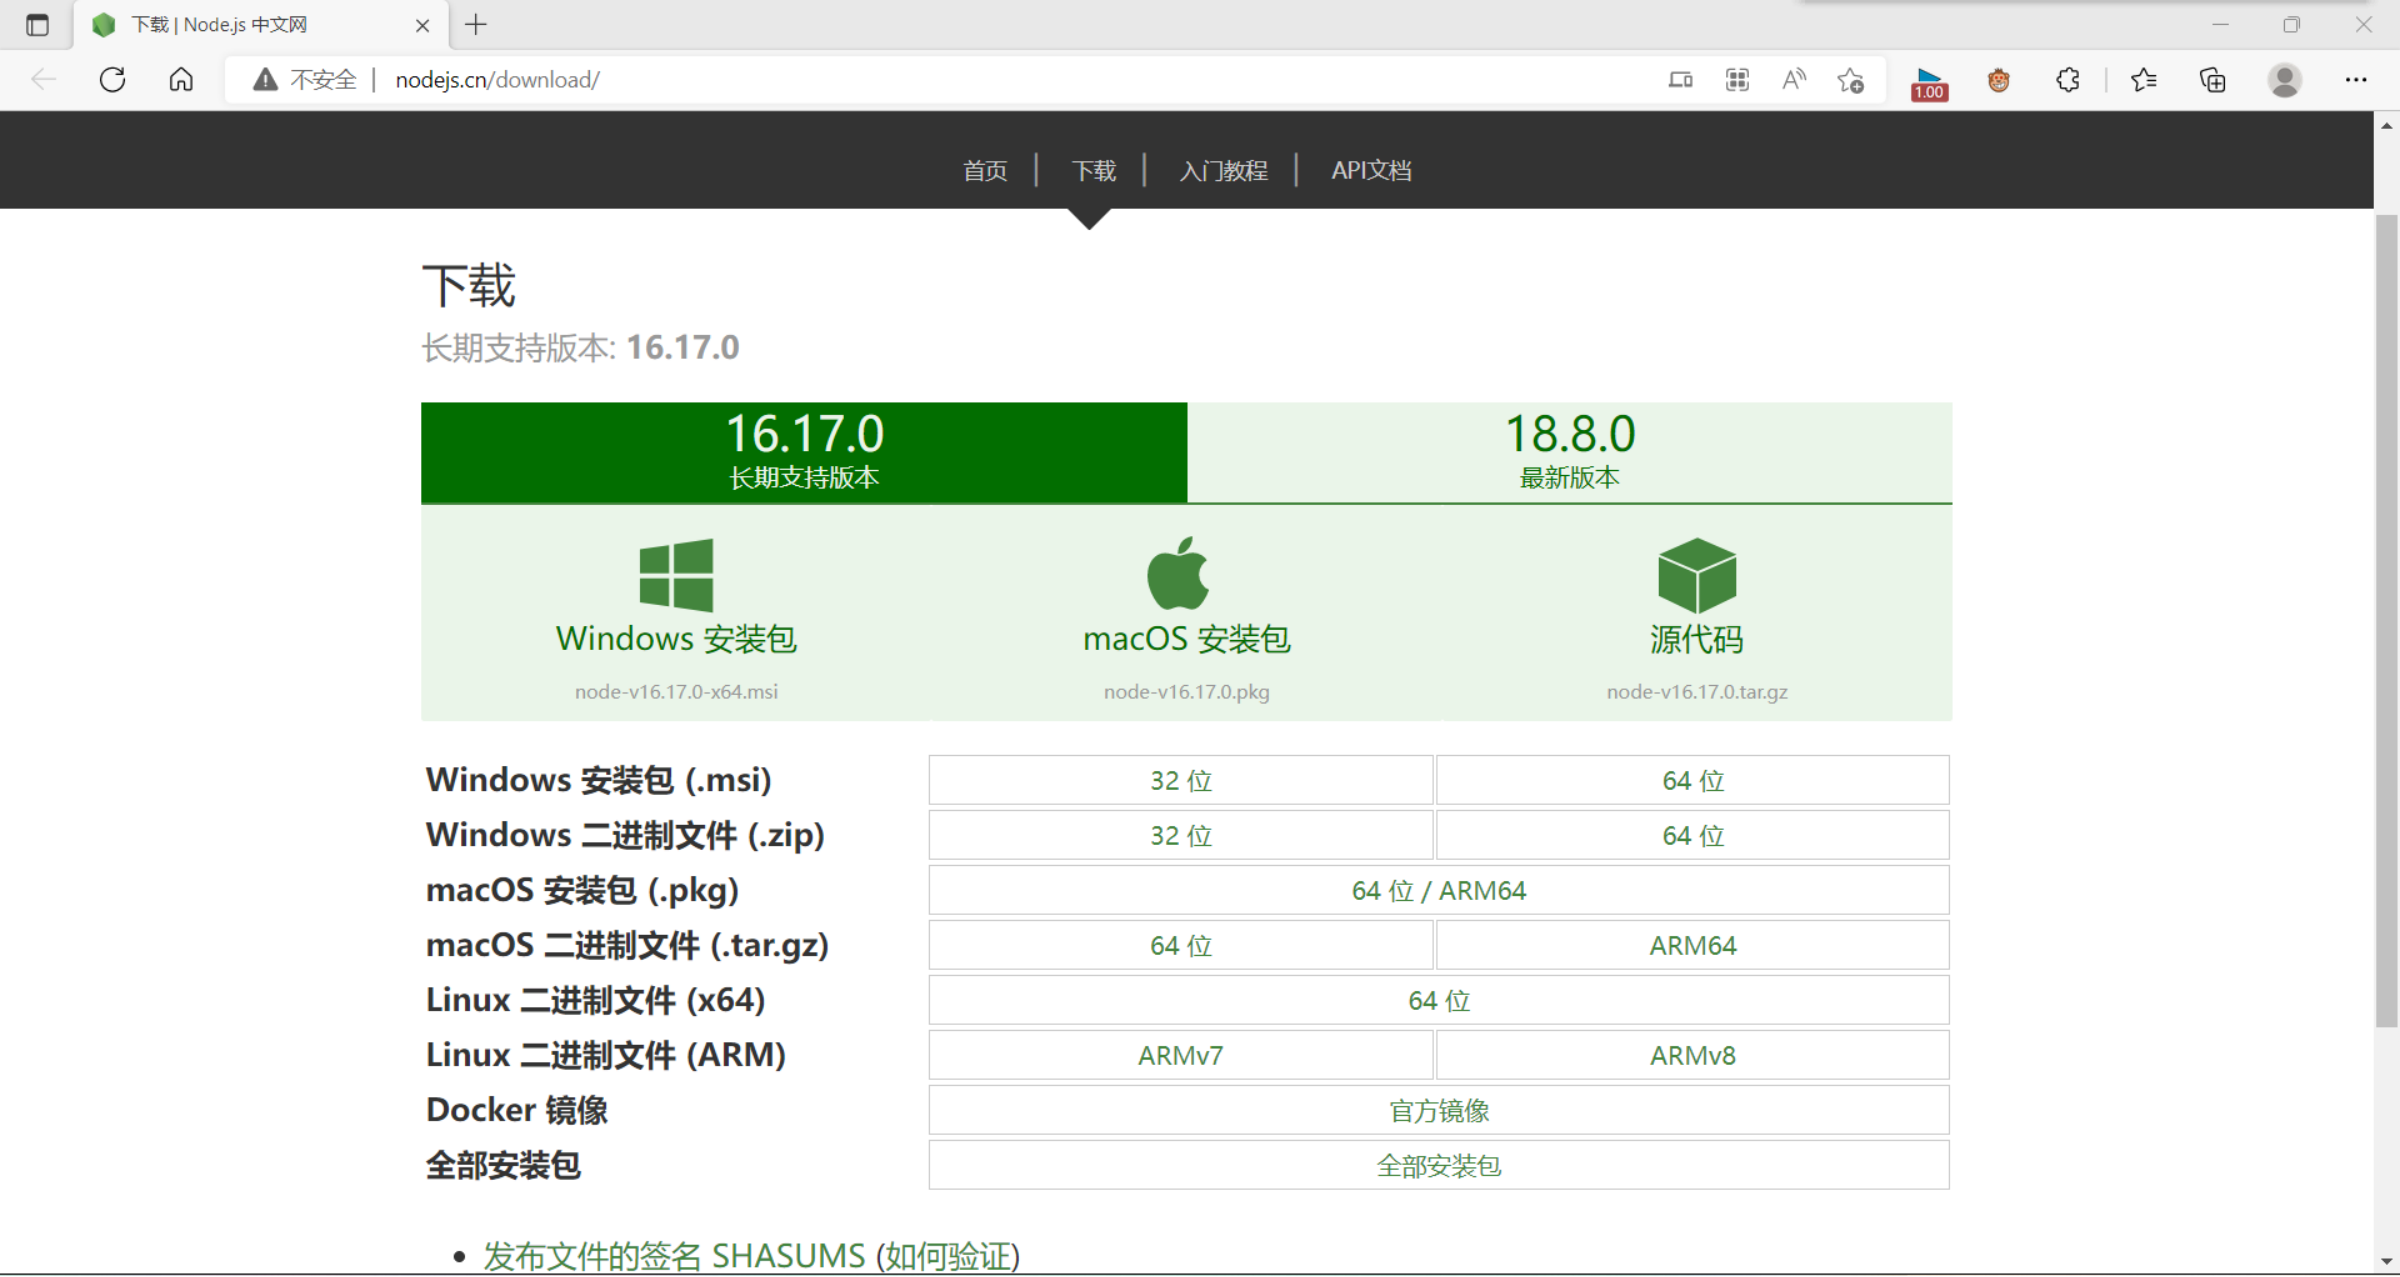
先在官网上下载Node.js 下载 | Node.js 中文网 (nodejs.cn)
Git
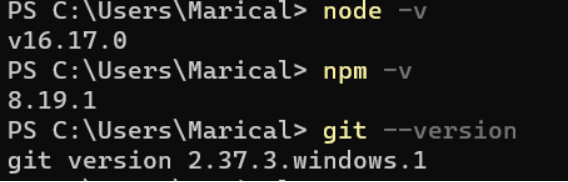
安装好后
分别输入
1 | node -v |
确认node.js安装
1 | npm -v |
确认node.js的一个伴随软件安装
1 | git --version |
确认git安装
Hexo
确认好后,就可以安装我们的Hexo了,输入以下代码即可安装
1 | npm install hexo-cli -g |
创建仓库
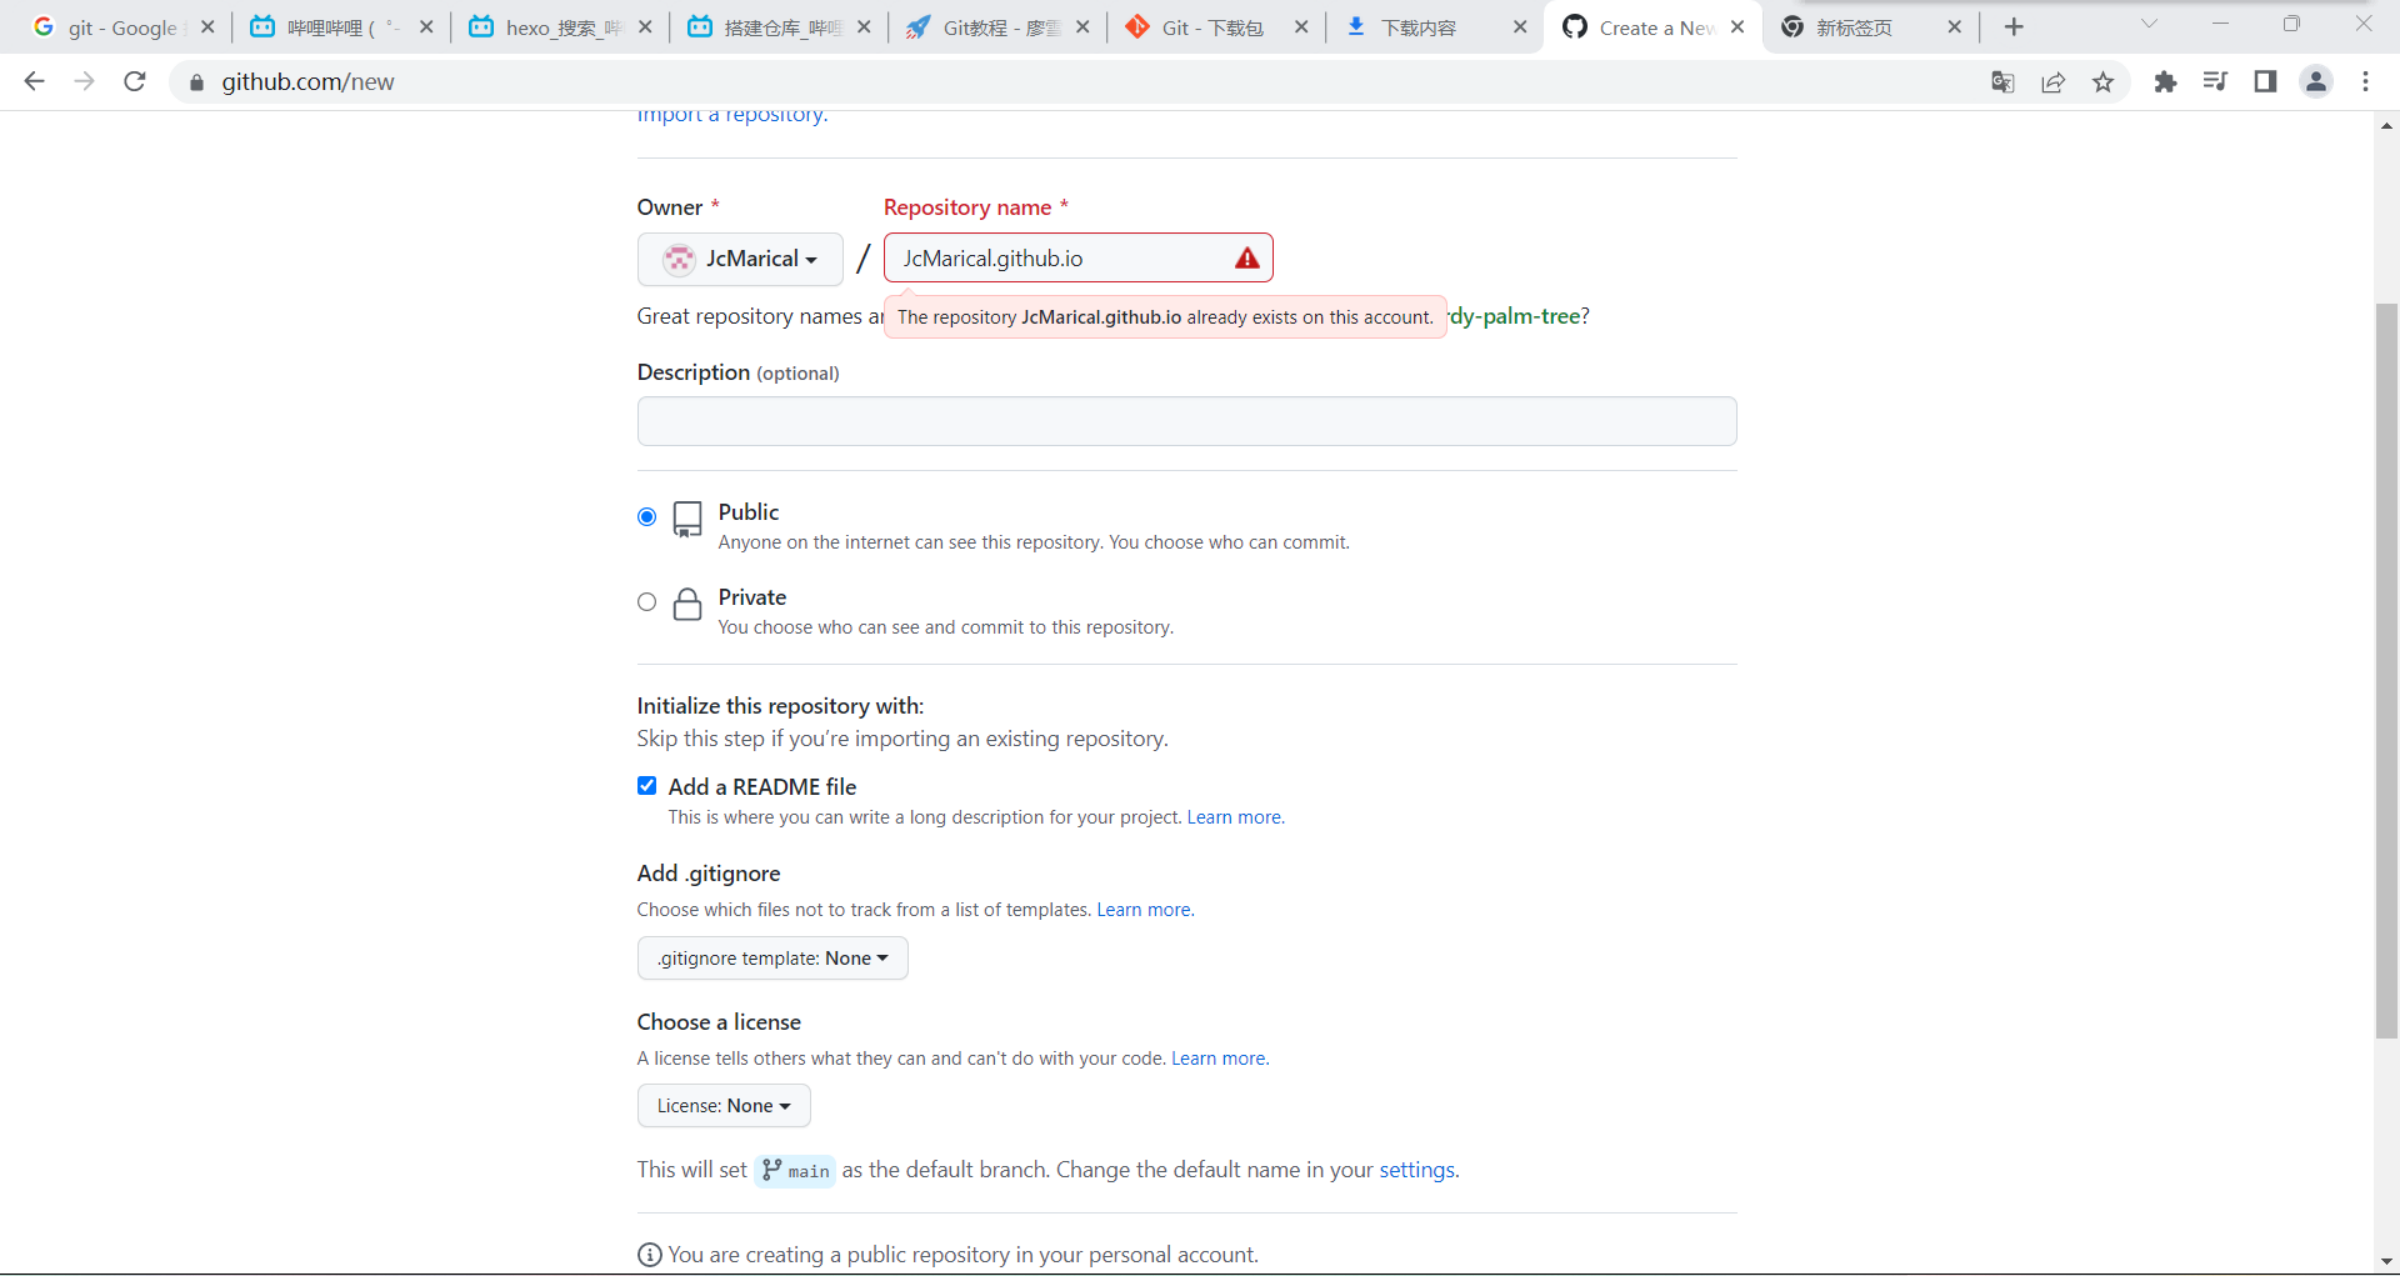
登录Github后
点击左上角的New
名字格式为用户名.github.io(我这里报错是因为已经创建了)
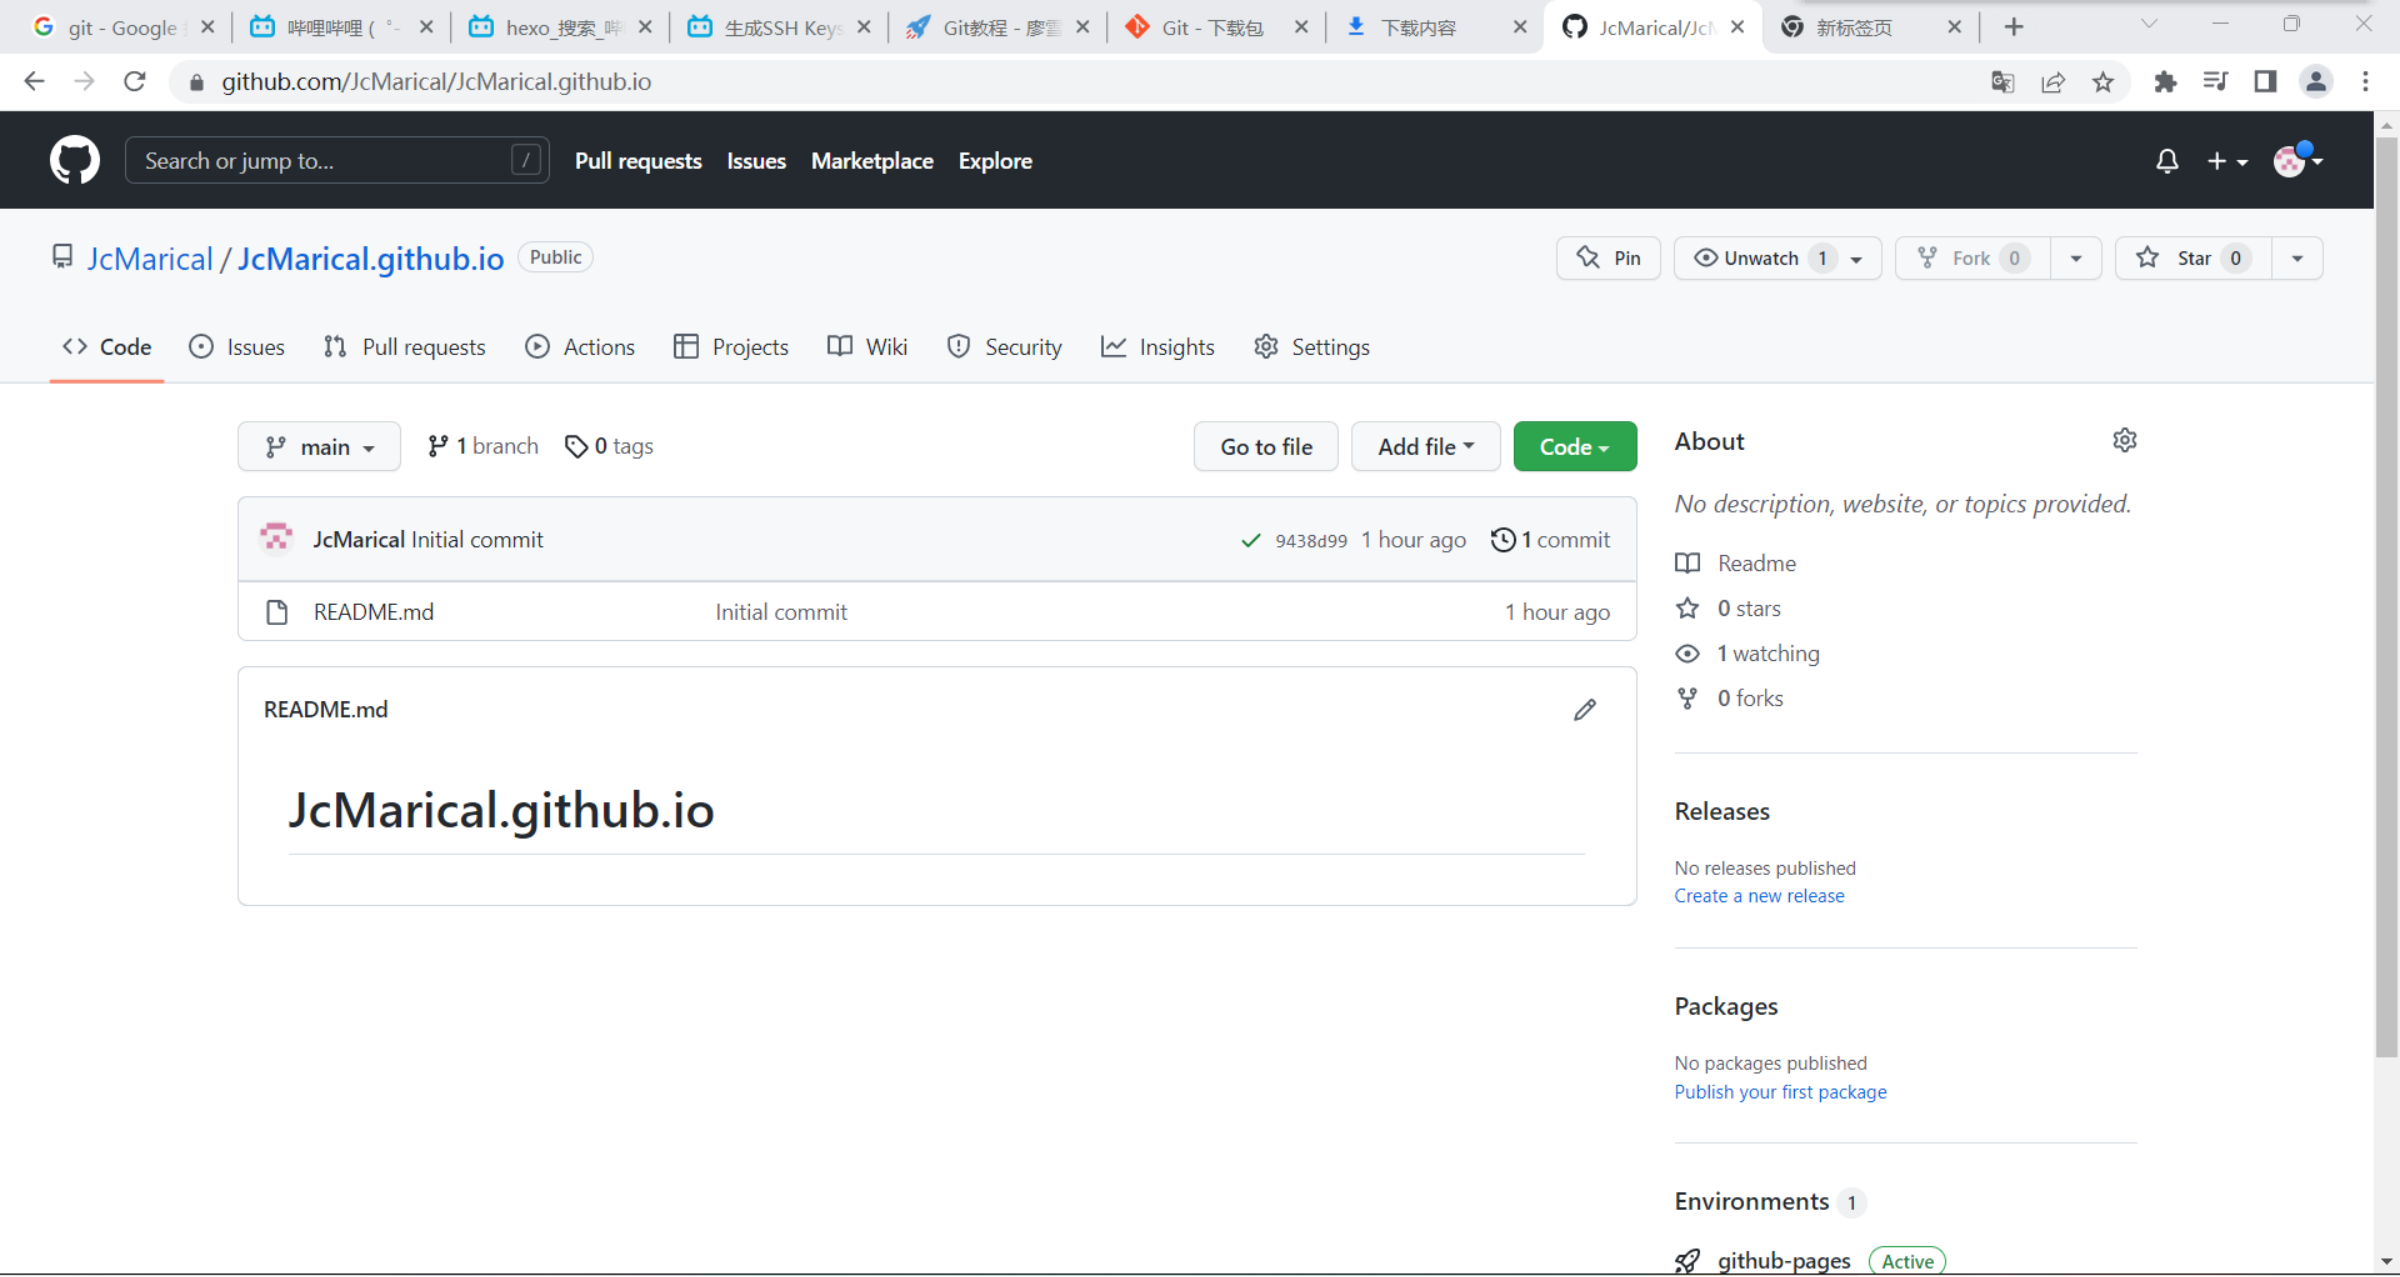
搭建完毕如图所示
生成SSH Keys
基本原理和ssh远程免密登录操作相似
首先新建文件夹
右键空白处点击 Git Bush Here

再输入
1 | $ ssh-keygen -t rsa -C "Github注册用电子邮箱" |
输入几个回车和y即可获得密钥
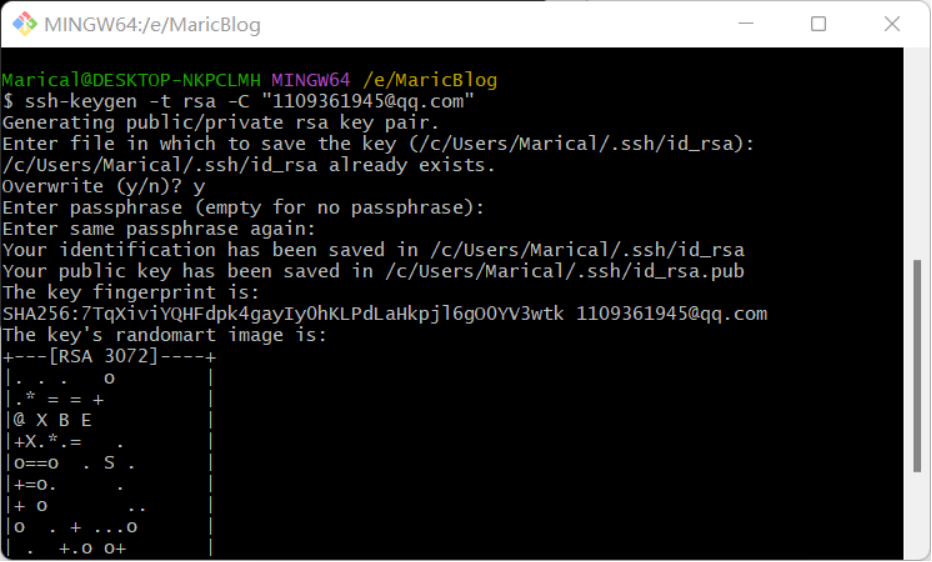
然后在此电脑\users\个人文件夹.ssh 里找到id_rsa.pub公钥,用记事本打开后全选复制

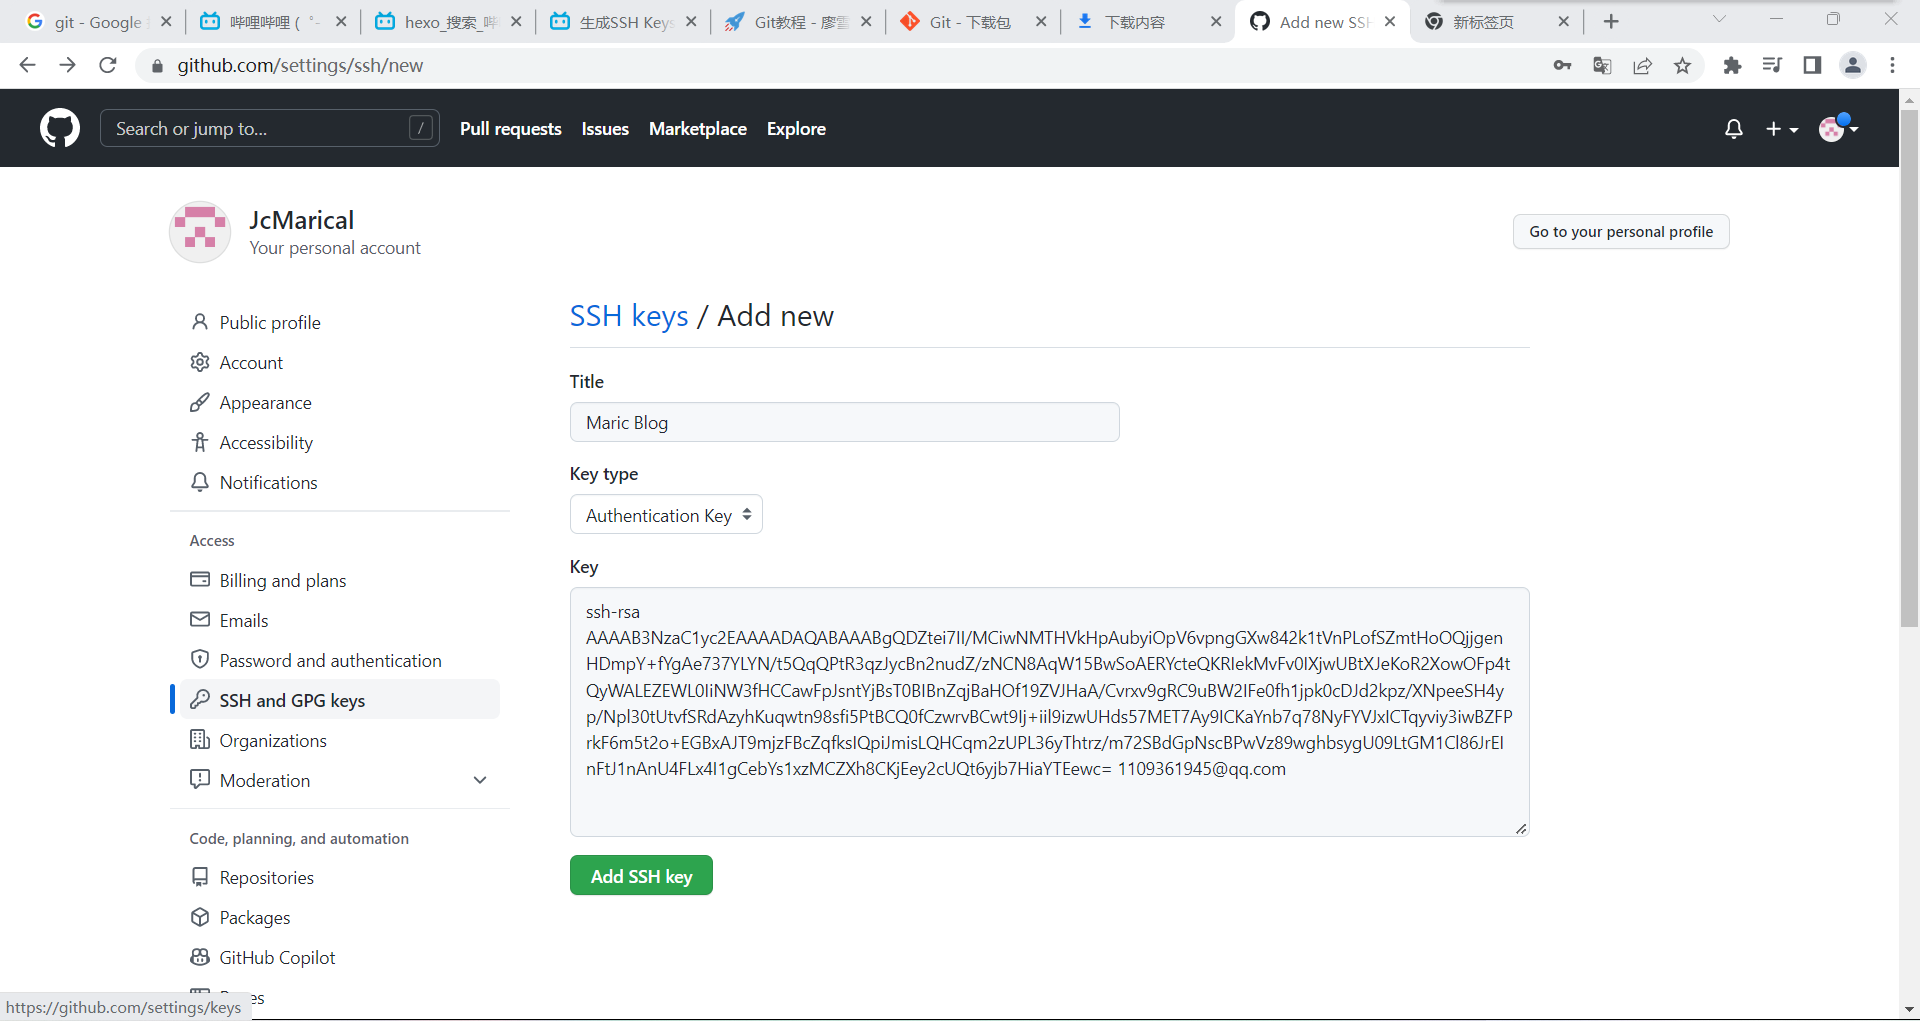
打开Github,点击头像右边的小三角,选择Setting,然后在出现的界面中,选择SSH and GPG keys,再点击右上角绿色的New SSH Key
名称随意填写,把复制的东西粘贴到下面的Key即可
本地生成博客
然后转到我们的MINGW64页面
输入
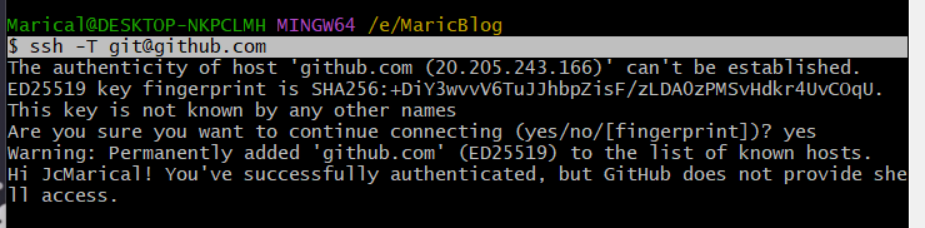
1 | ssh -T git@github.com |
选择yes,我们便成功连接上了github
初始化服务器
1 | hexo init |

启动服务器
1 | hexo s |

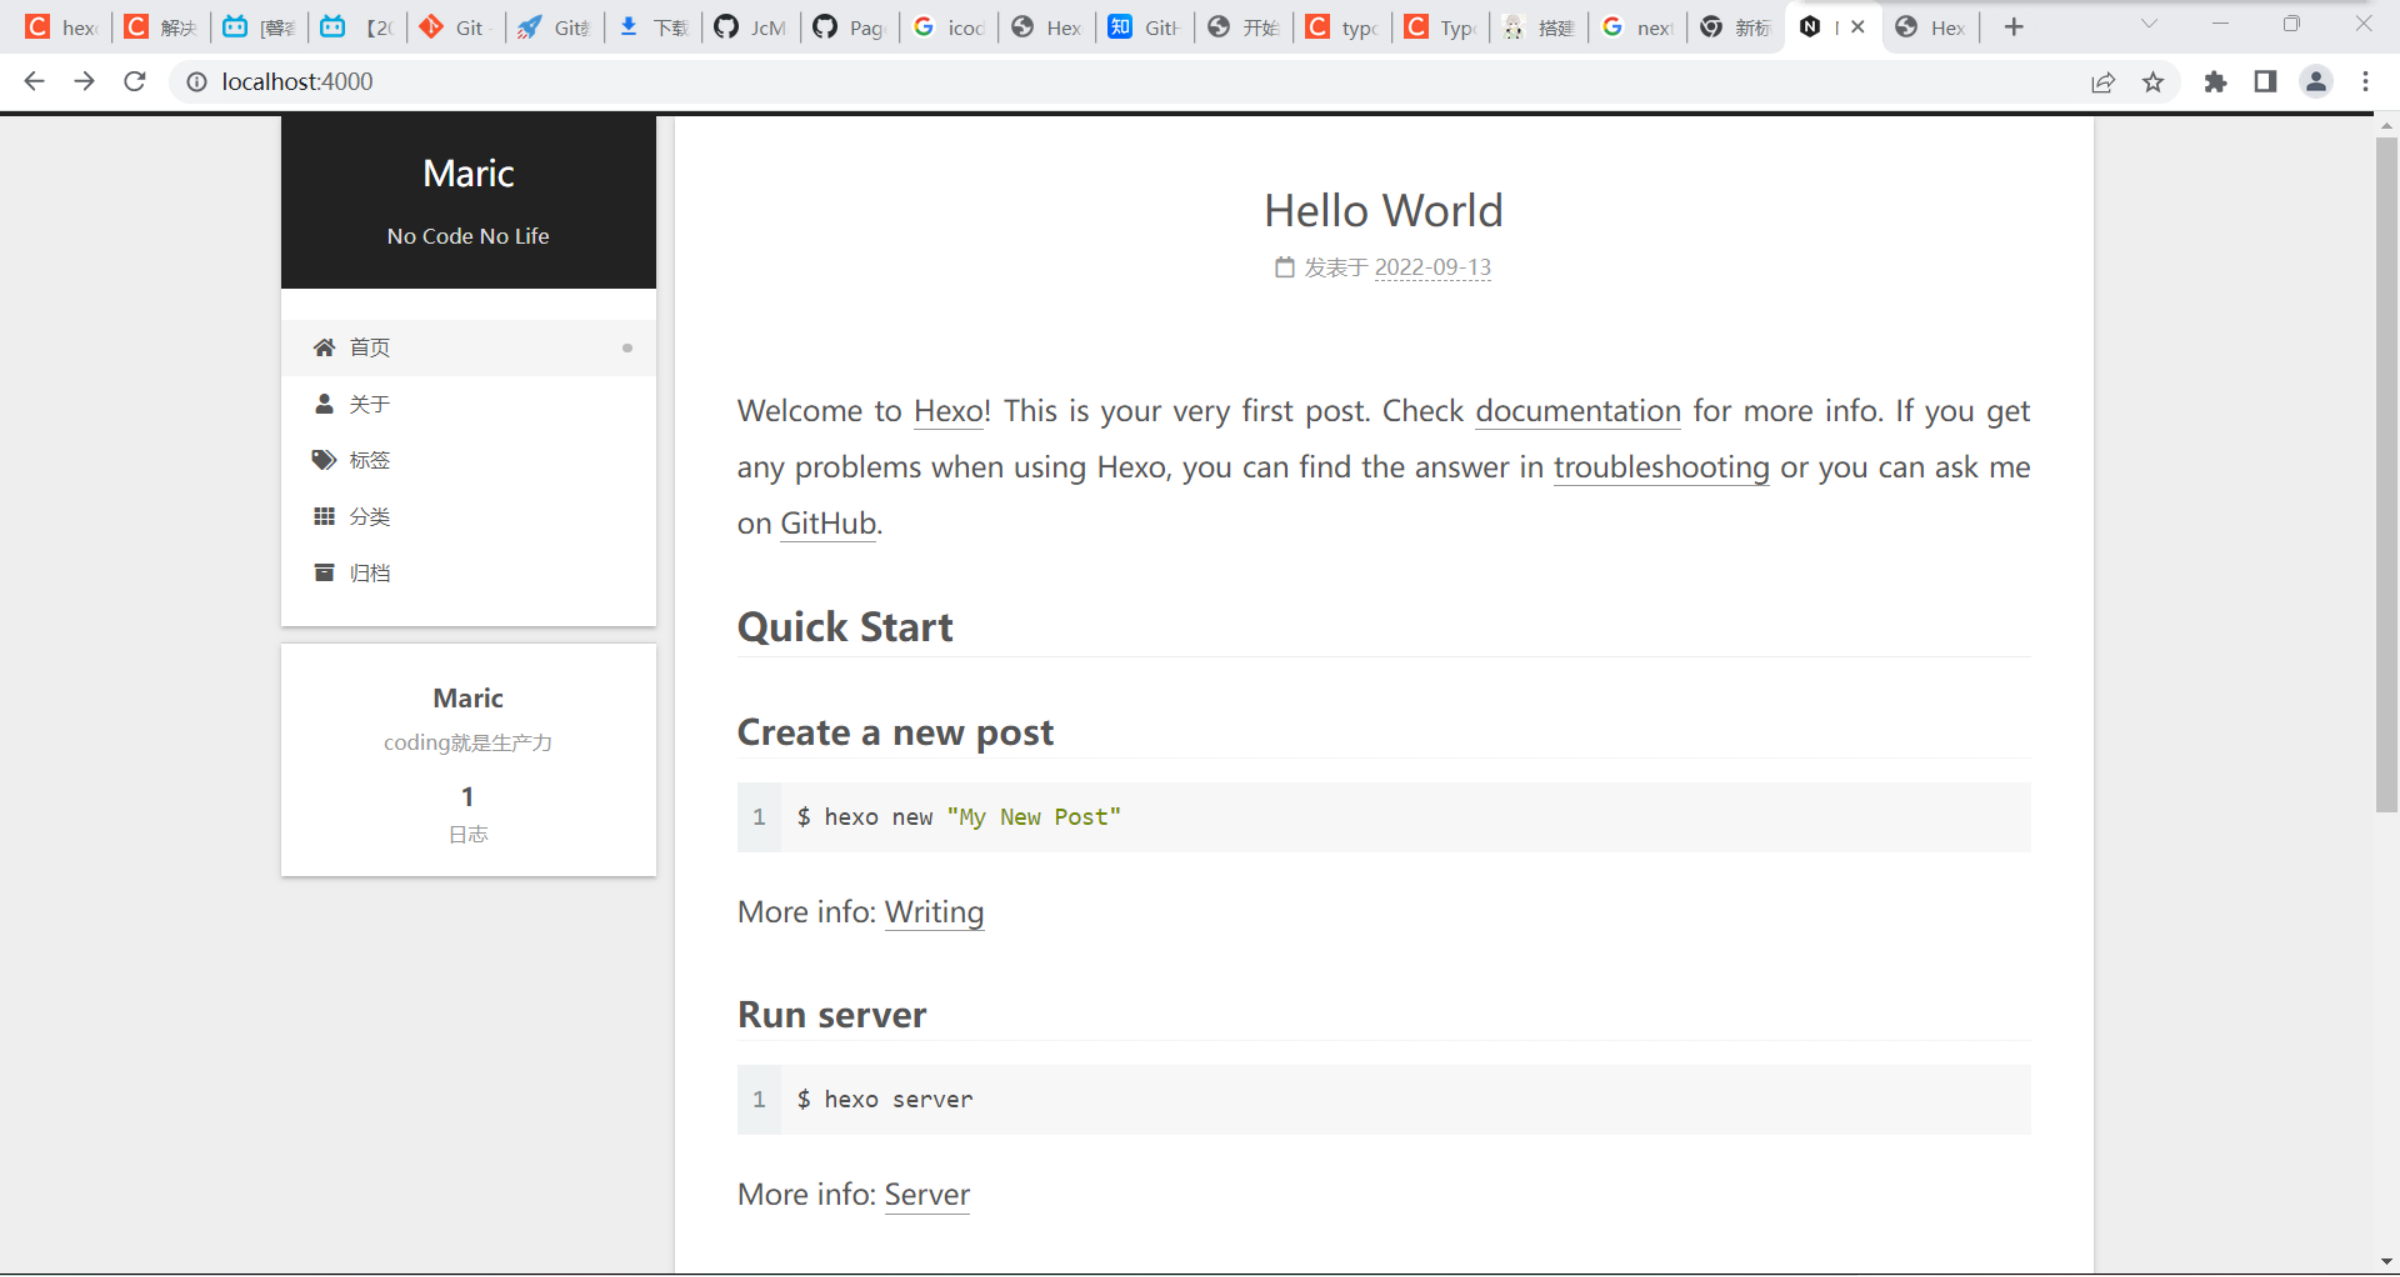
启动后输入http://localhost:4000/即可看到自己的博客
发布博客
回到我们之前创建的空文件夹,发现已经多出了很多文件,找到**_config.yml**配置文件,打开(我这里用的是Vscode)
找到下方的
1 | deploy: |
改为(注意冒号后有空格)
1 | deploy: |
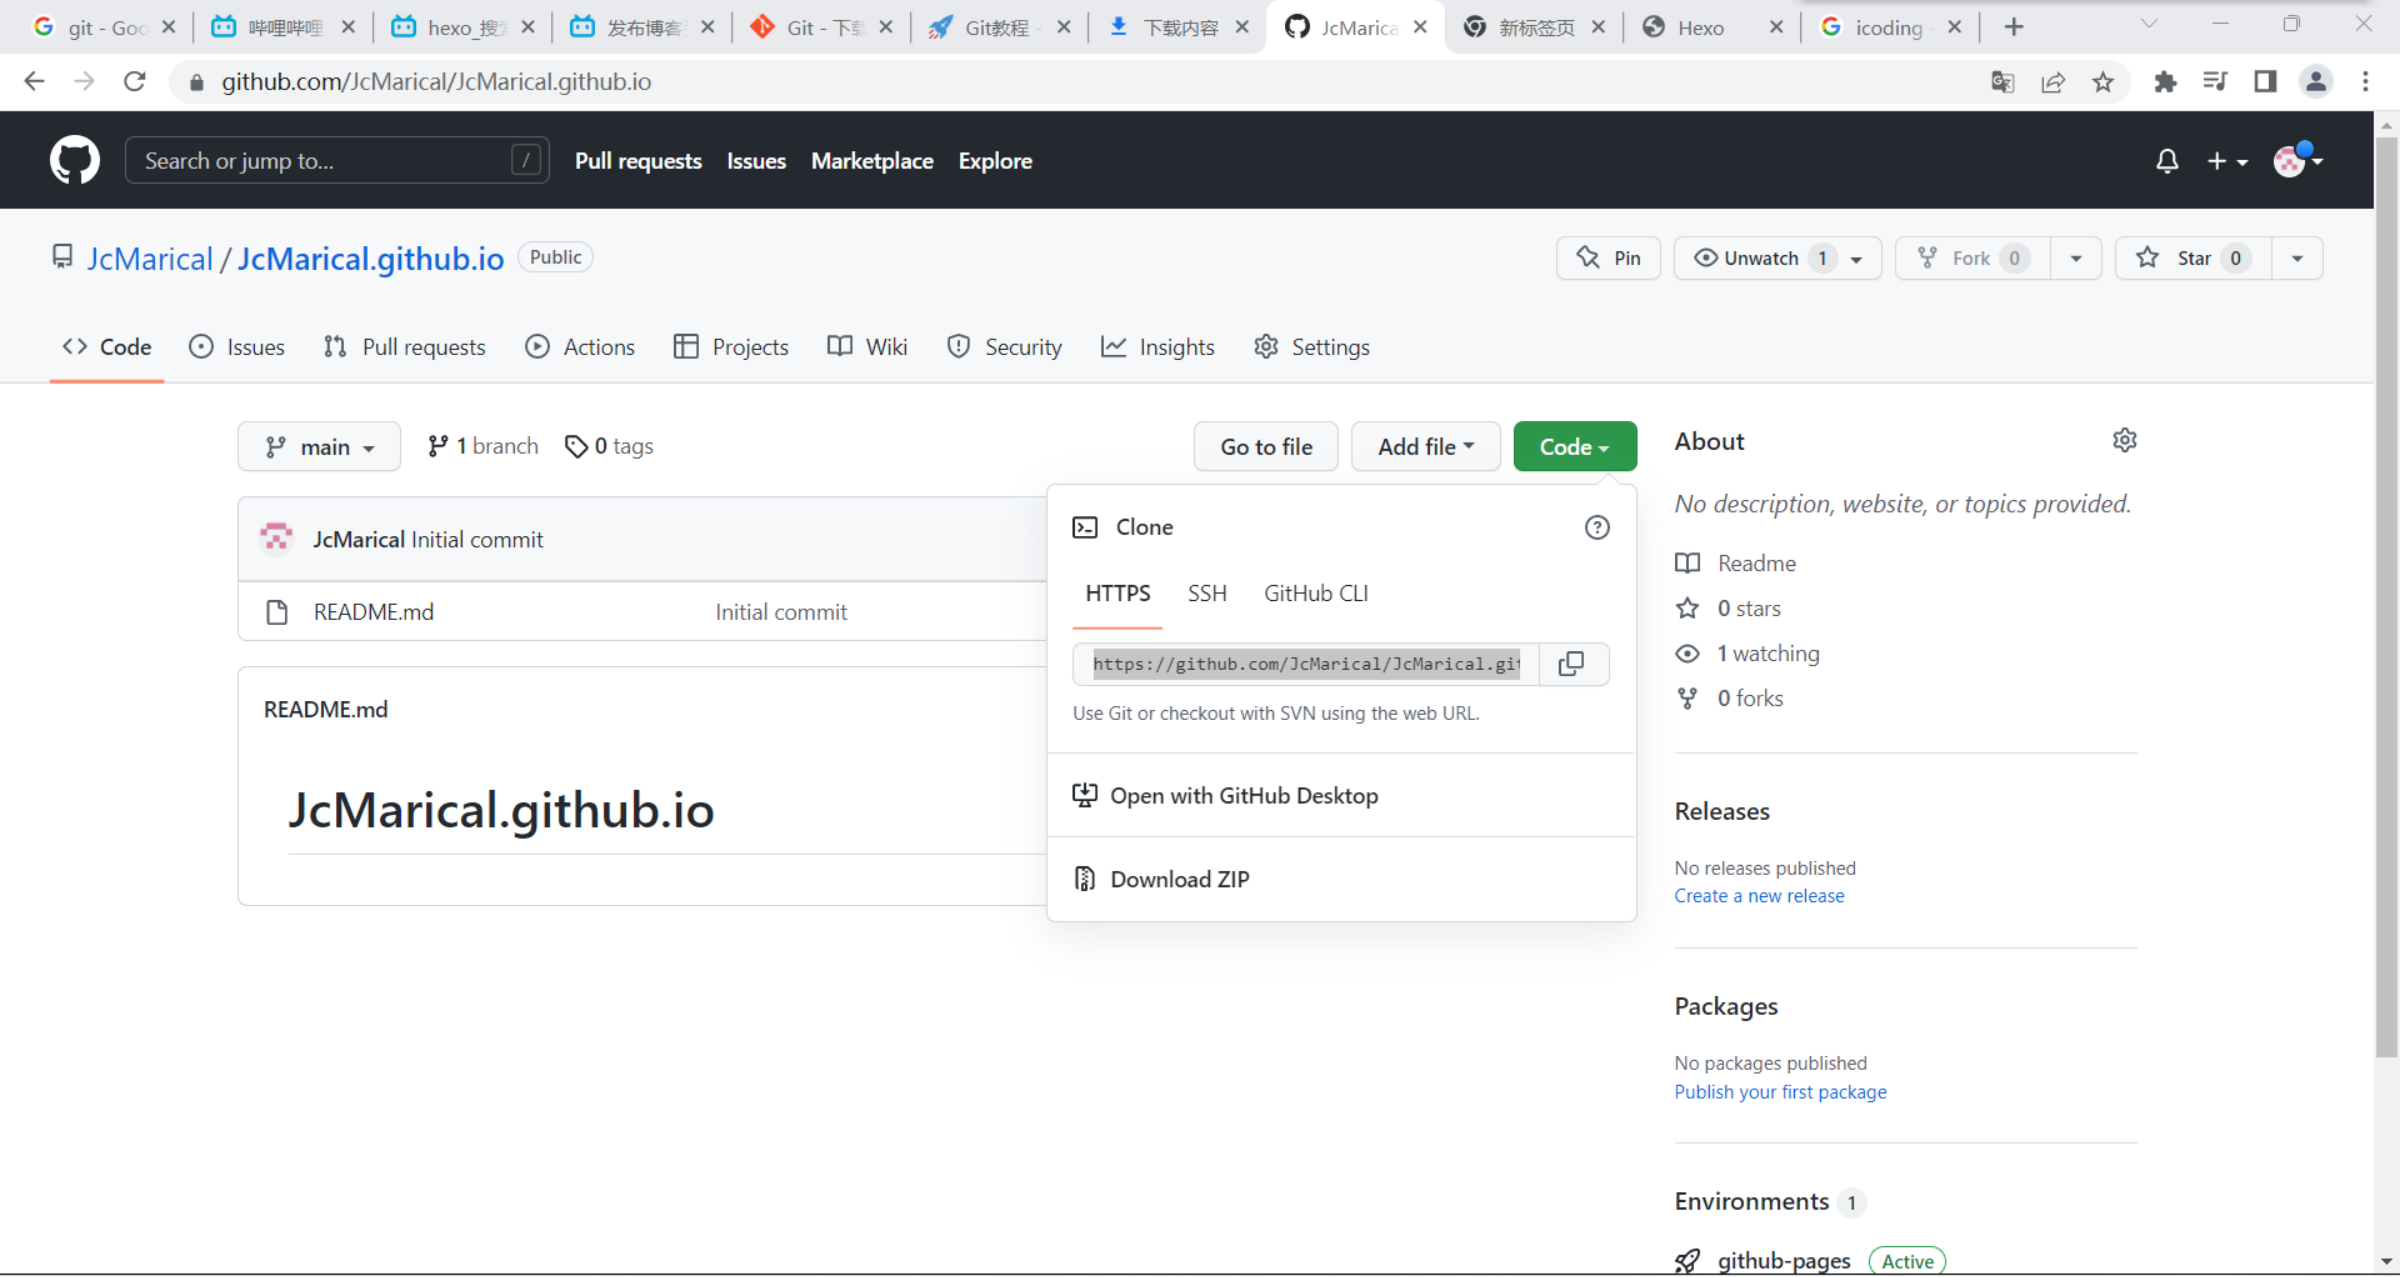
然后打开我们的github之前创建的仓库,点击绿色的Code,复制里面的链接到repository: 后面(注意冒号后有空格)
写成如下格式
 t
t
然后安装 自动部署发布工具:
1 | npm install hexo-deployer-git --save |
然后输入生成页面语句
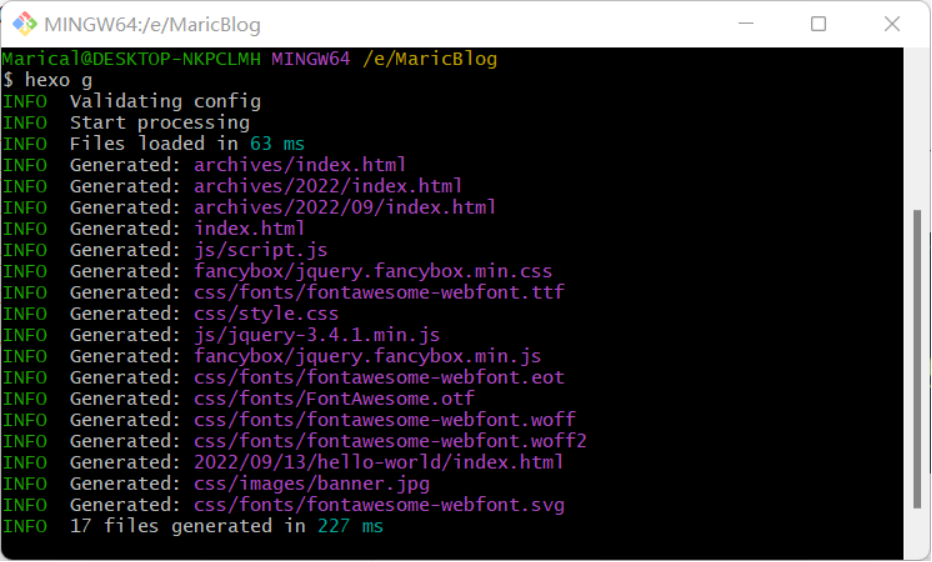
1 | hexo g |
然后是上传我们的文件到github上
1 | hexo d |
输入后会出现一个登录界面(没成功多次几次,实在不行用点魔法)

登录后
我们的Github个人博客就正式发布在互联网上了!!!
输入用户名.github.io即可看到自己的博客了
博客个性化设置
主题设置
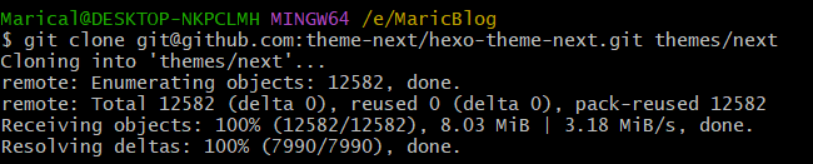
在Github开源了许多关于Hexo的博客主题,我这里选择使用Next作为我的主题
Hexo目录构成
node_modules:里面存放Node.js各种库的目录
public:生成网页的文件目录
scaffolds:存放新文章和新页面的初始设置
source:存放文章,各类页面,图像等文件
themes:存放着主题文件
_config.yml:站点配置文件
配置主题
在终端窗口下,定位到 Hexo 站点目录下。使用 Git checkout 代码:
1 | $ cd your-hexo-site |
删除 themes/next 文件夹里的**.git和.gitigore**文件,因为博客文件夹不能有两个git管理。

然后修改站点配置文件:
把主题修改为 next

在终端执行后,可以看到本地网站主题已经被更换
1 | $ hexo s |
Next目录构成
languages:语言 [通常保存本网站支持的语言设置和支持]
layout:布局文件[通常此文件中添加或者删除一些小功能]
pages:页面文件
scripts:脚本文件 [存放一些JavaScript脚本文件]
sources:资源文件 [存放一些图片,特效之类的文件]
config.yml:主题配置文件
static_prefix.yml:静态网页参数
主题配置美化
1、设置博主文字描述和中文语言
站点配置文件修改Site:
1 | # Site |
2、设置Next主题样式
主题配置文件中,Next提供了四种主题样式,根据个人的喜好选择即可(可以都试试哦)。
个人偏好Genemi一些
1 |
|
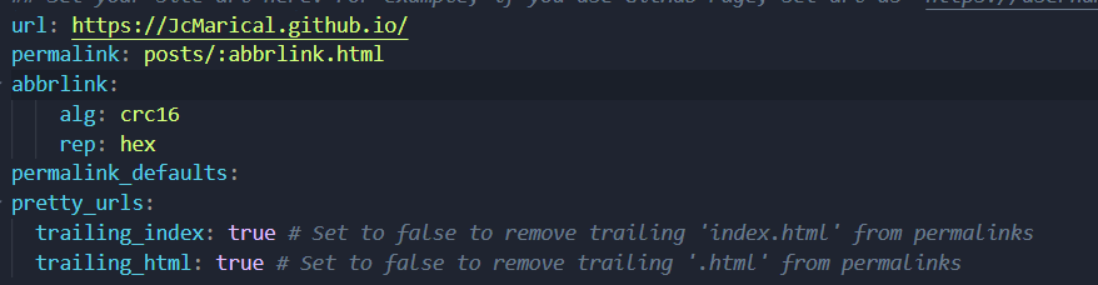
3、设置博客文章持久化链接
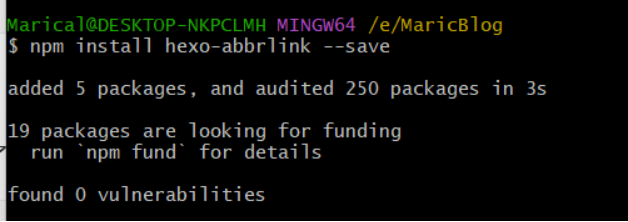
发布博客后,它的默认url地址是带中文的,并且进行了多层分级,非常复杂,因此需要在终端安装这个插件简化url。
1 | $ npm install hexo-abbrlink --save |
站点配置文件修改permalink添加如下内容:
1 | url: https://(用户名).github.io/ |
4、Menu添加关于、标签、分类页面
主题配置文件修改menu,将about、tags、categories前的#号去掉,示例如下:
1 | menu: |

新建相关页面
1 | $ hexo new page "about" |
修改生成页面的配置
source/about/index.md
source/tags/index.md
source/categories/index.md
1 |
|
5、添加搜索功能
安装exo-generator-searchdb这个插件
1 | npm install hexo-generator-searchdb --save |
站点配置文件添加
1 |
|
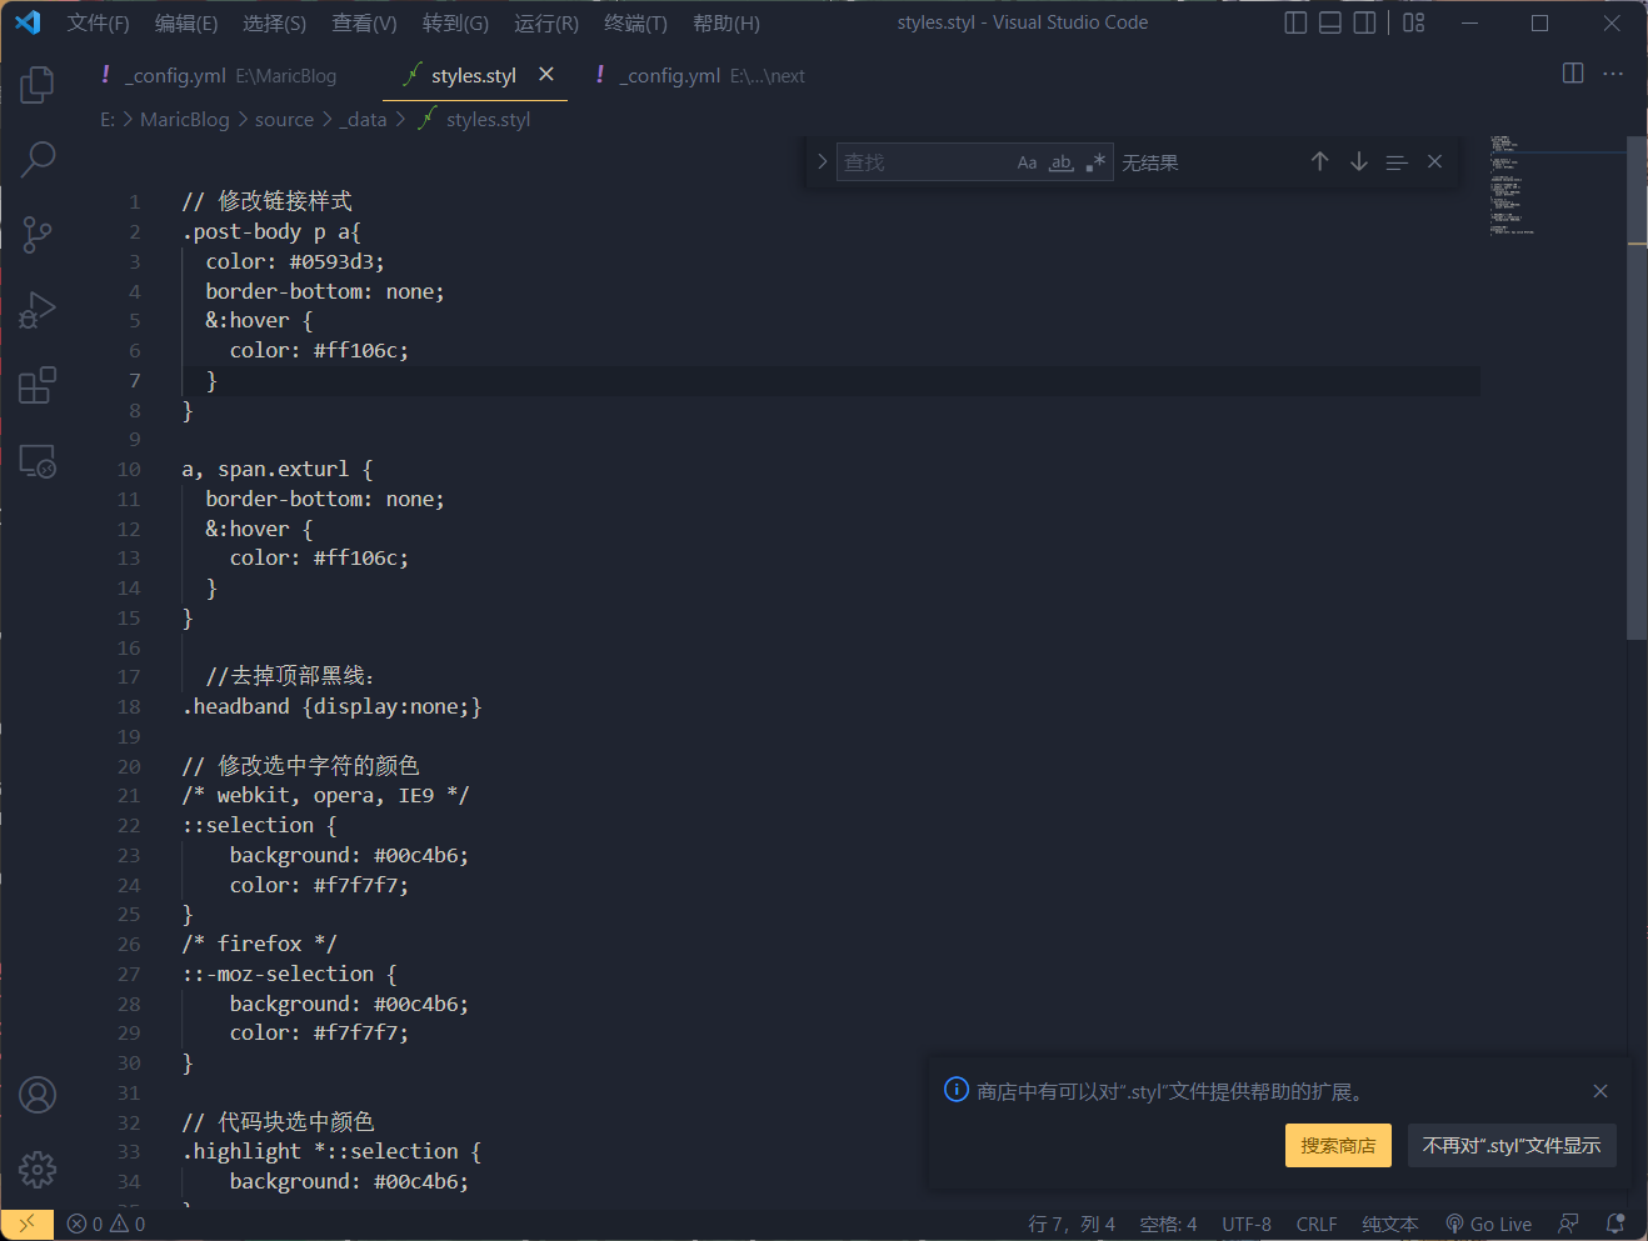
6、对于网站样式的自定义
在博客根目录下的source文件夹下新建_data文件夹并添加styles.styl文件,就可以对in网站样式进行自定义
以我的个人博客为例,我做了如下自定义样式:修改链接样式、去掉顶部黑线、修改选中字符的颜色、修改代码块选中的颜色、修改引用样式。
1 | // 修改链接样式 |
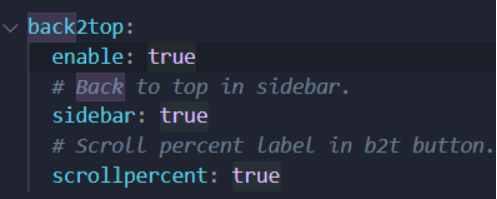
7、设置侧栏阅读进度百分比
编辑站点配置文件,修改 back2top 部分如下
1 | back2top: |
8、设置字数统计和预计阅读时间
在博客根目录下安装插件:
1 | npm install hexo-symbols-count-time --save |
编辑站点配置文件,添加如下内容:
1 | #文章、站点字数统计 |
修改主题配置文件:
1 | symbols_count_time: |
9、网站底部添加网站运行时间
修改主题下layout/_partials/footer.swig,在**{ {- next_inject(‘footer’) } }**上方添加如下内容:
1 | <!-- 网站运行时间的设置 --> |

10、添加自定义404页面
1 | hexo new page 404 |
编辑新建的页面文件,默认在站点根目录下 /source/404/index.md(注意把网址名称改成你自己的)
1 |
|

11、添加图片放大预览功能
在主题配置文件,启用 fancybox,修改配置如下:
1 | fancybox: true |
12、隐藏网页底部 powered By Hexo / 强力驱动
修改主题配置文件:
1 | powered: false |
13、网页底部添加动态桃心
在主题配置文件中启用
1 | icon: |
14、图片懒加载设置
在主题配置文件中启用lazyload
1 | lazyload: true |
15、设置标题栏背景图片
博客根目录下的source/_data/styles.styl文件,添加如下代码:
1 | // 标题栏背景图片 |
/images/bg.png指的是根目录下**public/images/**下的图片
16、修改文章底部tag标签
把文章底部#标签改为图标,在主题配置文件中修改:
1 | tag_icon: true |
17、设置头像
在主题配置文件中修改avatar
1 | # Sidebar Avatar |
/images/avatar.png指的是根目录下**public/images/**下的图片

18、网站底部加上访问量
修改主题下layout/_partials/footer.swig,在**{ {- next_inject(‘footer’) } }**上方添加如下内容:
1 | <script async src="//busuanzi.ibruce.info/busuanzi/2.3/busuanzi.pure.mini.js"></script> |
19、顶部阅读进度条
主题配置文件中修改 reading_progress 选项
1 | reading_progress: |
20、设置网站图标
在主题配置文件中修改favicon
1 |
|
/images/favicon.png指的是根目录下**public/images/**下的图片(我暂时还未设置)
21、侧边栏社交链接
(添加你本人的网站)修改主题配置文件中socail选项:
1 | social: |
22、阅读全文按钮样式
在博客需要显示摘要的地方加上 more标签,就不会显示全文。
23、更改新建文章的模板
默认新建文章没有分类这个选项,需要自己填写,现在修改 博客文件夹/scaffolds/post.md 文件 。
1 |
|
24、设定代码高亮格式
在站点的配置文件中,搜索highlight
1 | highlight: |
主题配置有关于代码高亮样式的选择,搜索highlight,一般选择normal即可
25、代码块复制选项
主题配置文件搜索copy_button:
1 | copy_button: |
26、添加萌萌哒Live2D模型
安装插件
1 | npm install --save hexo-helper-live2d |
在站点配置文件中添加:
1 | # live2d |
我使用的是一个二次元女生的模型,使用以下命令下载组件,如需使用别的看板娘,请自行百度搜索
1 | npm install live2d-widget-model-shizuku |
- 在Hexo根目录中新建文件夹live2d_models
- 在 node_modules 文件夹中找到刚刚下载的 live2d 模型,将其复制到 live2d_models 中。live2d 模型是一个类似于这样的文件夹:live2d-widget-model-hijiki
- 更新站点配置文件中model:use项,将其修改为 live2d_models 文件夹中的模型文件夹的名称
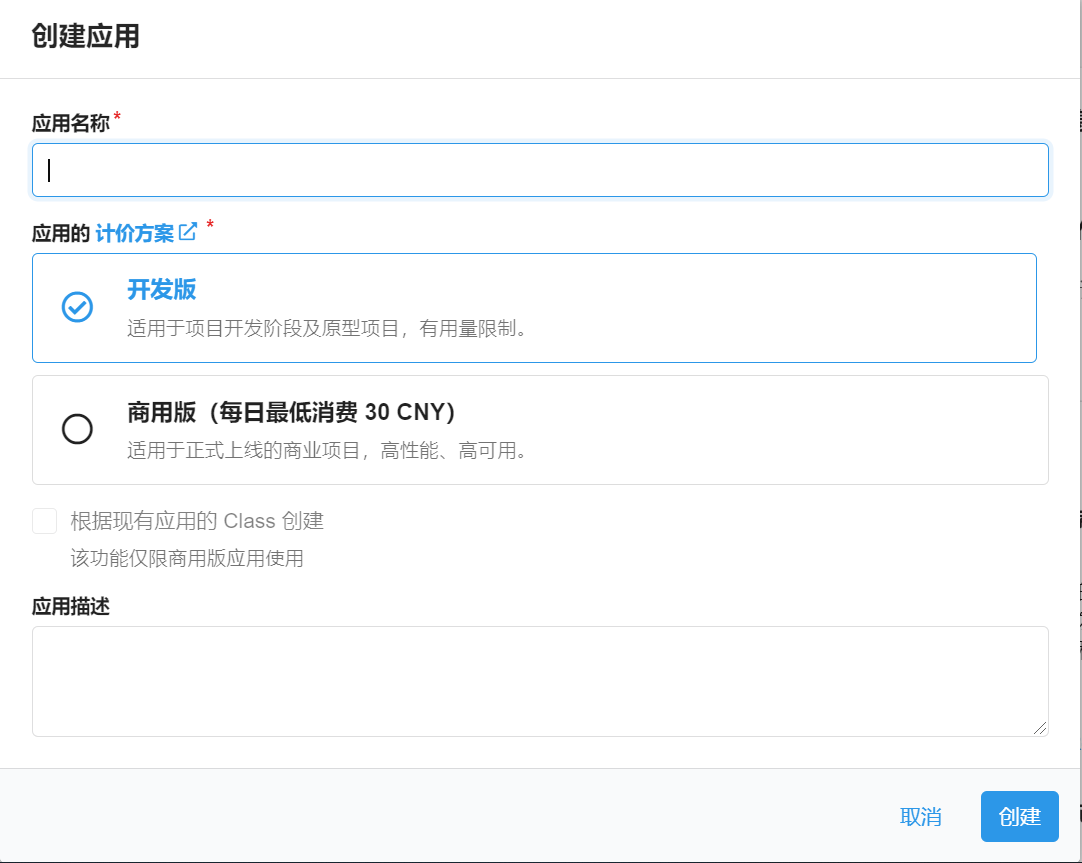
27、(增强网页安全性)开启Valine评论系统
注册 Leancloud 账号,注册完成后进入app控制面板->创建应用->创建开发版应用。
接下来我们配置一下我们的leancloud。点击设置->安全中心->Web 安全域名,输入你的博客网址来保证其他人就算获取了你的appid也没办法操作你的数据库。

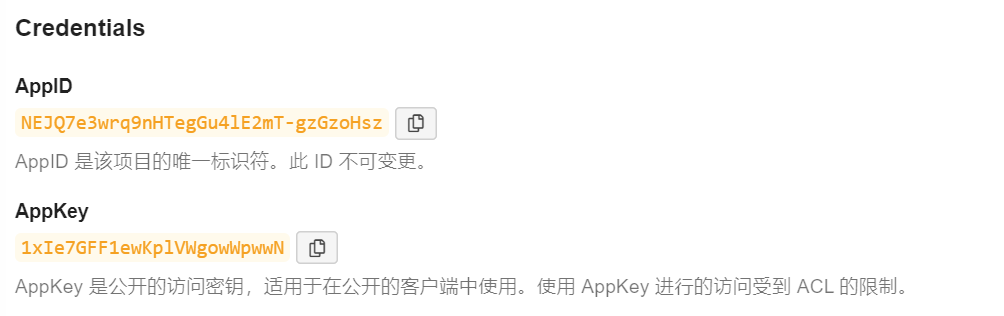
接下来点击应用凭证获取你的appid和appkey。
打开主题配置文件,找到comments栏目并开启valine。
1 | comments: |
往下滑动进入valine设置栏,开启valine并填入你的appid和appkey。
1 | valine: |
这里稍微解释一下各个参数的用途。
placeholder是在用户未输入任何参数时默认显示的值;avatar是默认用户头像,参考link;meta是可以选择的用户信息栏。
为了让Valine更加简洁,我们可以自定义Valine的显示,我是去除了Valine的power by、svg标签、下方的评论提示。具体做法是修改source/_data/styles.styl:
1 | // 隐藏 valine 的 powered by |
至此你的评论系统已经开启。
28、添加对表情符号的支持
安装
1 | npm install hexo-filter-emoji |
在站点配置文件添加:
1 | # 为博客添加emoji表情支持 |
结束语
花了三天时间,算是把这篇『从零开始搭博客』完成了。感谢前人写下的教程,也感谢前人为搭博客写下的软件。在整个搭博客的过程中,我对git的使用,对github的使用,对Markdown文件排版的格式都有了更深层次的理解。同时在看到自己做的博客一步步成型,能感受到的满足感也让我对Web的道路更加充满信心。希望我写的这篇文章也能给看到的人留下一点小小的帮助。
欢迎搜索我的博客,可以在这里留下你的评论哦
https://jcmarical.github.io/ Maric的Blog